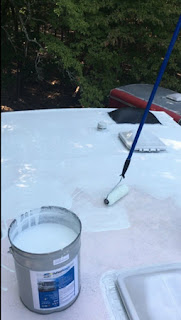
The Ultimate Guide to RV Roof Sealant
Maintaining your RV roof is one of the most important things you can do to protect your investment. Over time, exposure to the elements can cause wear and tear, leading to leaks and other problems. Using a high-quality RV roof sealant can extend the lifespan of your RV roof, prevent water damage, and ensure a safe and comfortable experience on the road.
Why Do You Need an RV
Roof Sealant?
Your RV’s roof is constantly exposed to harsh weather conditions like rain, sun, wind, and even snow. Over time, these factors can lead to cracks, leaks, and damage. Using a camper roof sealant provides a protective barrier that:
Prevents Leaks: Seals any cracks or gaps, keeping water out.
Extends Roof Life: Protects against UV rays and other environmental factors.
Improves Energy Efficiency: Reflective sealants can reduce heat absorption, keeping your RV cooler.
Saves Money: Regular maintenance with a sealant can prevent costly roof repairs or replacements.
Types of RV Roof Sealants
There are several types of RV roof sealants available, each designed for specific materials and applications. Here’s a breakdown of the most common options:
Liquid Roof Coatings
These are applied like paint and create a seamless, waterproof membrane. Liquid coatings are an excellent choice for larger surfaces and provide long-lasting protection.
Tape Sealants
Perfect for small repairs, tape sealants are easy to use and ideal for sealing seams and joints.
Caulking Sealants
Used for detailed applications, caulking sealants are great for sealing around vents, skylights, and edges.
Silicone-Based Sealants
Known for their flexibility and durability, silicone sealants are suitable for various climates.
When choosing the best sealant for RV roof, it’s important to consider your roof’s material—whether it’s EPDM rubber, TPO, fiberglass, or metal.
How to Apply RV Roof Sealant
Applying RV roof sealant doesn’t have to be a daunting task. Follow these simple steps for a hassle-free application:
Clean the Roof
Remove dirt, debris, and any old sealant. A clean surface ensures the sealant adheres properly.
Inspect for Damage
Check for cracks, holes, or other issues. Repair any significant damage before applying the sealant.
Choose the Right Product
Make sure you select a sealant compatible with your roof material.
Apply the Sealant
Follow the manufacturer’s instructions. Most liquid coatings can be applied with a brush, roller, or sprayer. For caulking sealants, use a caulking gun to apply the product precisely.
Allow It to Cure
Let the sealant dry completely. This may take a few hours to a couple of days, depending on the product and weather conditions.
Benefits of Choosing
the Right RV Roof Sealer
Using the right RV roof sealer can make all the difference. Here are some key advantages:
Weather Resistance: High-quality sealants withstand extreme temperatures, rain, and UV rays.
Longevity: Durable products provide protection for years, reducing the need for frequent reapplications.
Ease of Use: Modern sealants are designed for DIY application, saving you time and labor costs.
Versatility: Many sealants are suitable for various roof materials, ensuring a secure bond and long-lasting performance.
Conclusion


Comments
Post a Comment