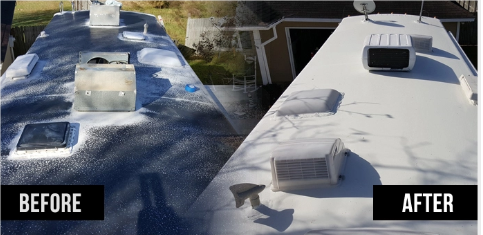
RV Roof Sealant: The Ultimate Solution for Roof Protection
If you own an RV, you know how important it is to maintain its roof. The roof protects you from the elements and keeps your RV in good condition. Over time, wear and tear, weather, and exposure to the sun can cause cracks and leaks. This is where an RV roof sealant becomes essential. It helps protect your RV’s roof and extends its lifespan.
Why You Need an RV Roof Sealant
RV roofs are constantly exposed to harsh weather, including UV rays, rain, and snow. Without proper protection, the roof can develop leaks, leading to water damage, mold, and costly repairs. A good camper roof sealant ensures your roof remains watertight, preventing these issues.
Here are some key reasons why an RV roof sealant is important:
Prevents Leaks: Seals cracks and gaps, preventing water from entering your RV.
Extends Roof Life: Adds an extra layer of protection against wear and tear.
Reduces Maintenance Costs: Helps avoid costly roof repairs by keeping the surface in good condition.
Improves Energy Efficiency: A well-sealed roof helps maintain temperature control inside the RV, reducing energy costs.
Protects Against UV Rays: Prevents damage from the sun’s rays, which can cause the roof material to deteriorate over time.
Types of RV Roof Sealants
There are several types of RV rubber roof sealant, each designed for different roofing materials and conditions. Here are the most common types:
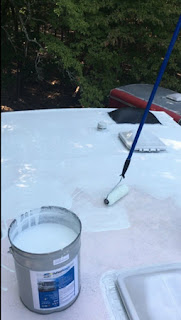
Liquid Roof Sealants
· Easy to apply using a roller or brush.
· Forms a seamless, waterproof layer.
· Ideal for sealing large areas.
Self-Leveling Sealants
· Best
for horizontal surfaces like flat RV roofs.
· Spreads evenly, filling cracks and gaps.
· Requires minimal effort for application.
Non-Sag Sealants
· Used for vertical surfaces and edges.
· Does not flow or drip, making it ideal for sealing around vents and seams.
Rubber-Based Sealants
· Designed specifically for rubber RV roofs.
· Flexible and resistant to temperature changes.
· Long-lasting protection.
How to Apply RV Roof Sealant
Applying trailer roof sealer is a straightforward process, but following the right steps ensures the best results. Here’s a simple guide:
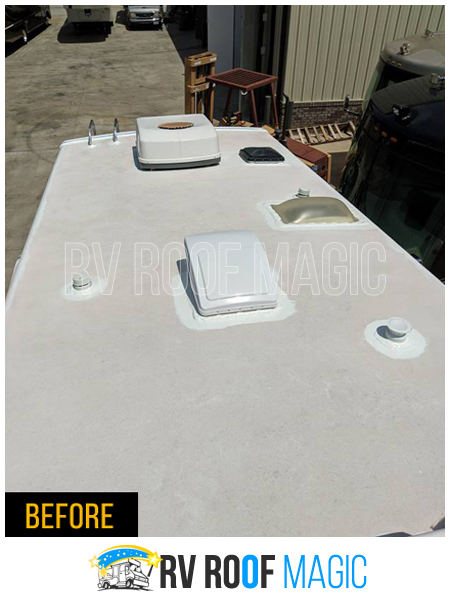
Clean the Roof
Before applying the sealant, clean the roof thoroughly. Remove dirt, debris, and any old sealant. A mild detergent and water work well for cleaning.
Inspect for Damage
Check for cracks, holes, or damaged areas. Repair any major issues before applying the sealant.
Choose the Right Sealant
Select a camper roof sealant that suits your RV’s roof type. Make sure it's compatible with rubber, metal, or fiberglass roofs.
Apply the Sealant
Use a brush, roller, or caulking gun to apply the sealant evenly. Ensure all seams, edges, and cracks are covered.
Let It Cure
Allow the sealant to dry completely before exposing it to
moisture. This may take a few hours to a full day, depending on the product.
Tips for Maintaining Your RV Roof
Regular Inspections: Check your roof at least twice a year for cracks, leaks, or damage.
Clean the Roof Frequently: Dirt and debris can wear down the sealant, so clean it regularly.
Reapply Sealant as Needed: If you notice cracks or peeling, apply a fresh layer of RV rubber roof sealant to maintain protection.
Protect from UV Rays: Consider using a UV-resistant sealant to prevent sun damage.
Fix Leaks Immediately: Don’t wait to repair small leaks, as they can become major problems over time.
Conclusion
Using a high-quality RV rubber roof sealant is essential for protecting your RV from leaks, damage, and costly repairs. Whether you choose a camper roof sealant or a trailer roof sealer, regular maintenance and timely application will ensure your RV’s roof remains in top condition. By following the right steps and using the best products, you can enjoy worry-free travel and extend the life of your RV roof.

Comments
Post a Comment