How to Waterproof RV/Motorhome using Roof Sealants during winter?
How
to Waterproof RV/Motorhome using Roof Sealants during winter?
Whether you are still roaming in
your RV during these autumn months or planning to get ready your RV for winter
months, waterproofing is an important detail to consider. Proper waterproofing
helps prevent water from entering and damaging your RV. You RVer want water to
leak slowly into the RV over the winter months.
RV maintenance is an important
part of RV ownership. Unlike a standard vehicle, RV’s generally take a bit more
wear and tear because of their size, and much of that comes down on the roof.
Keeping the RV roof in tip-top condition will help to prevent leaks. To do this
you need to apply an RV roof repair sealant.
Take a look at how to waterproof
your RV using RV roof repair sealant to keep the interior dry and free from
water damage during these cold winter months.

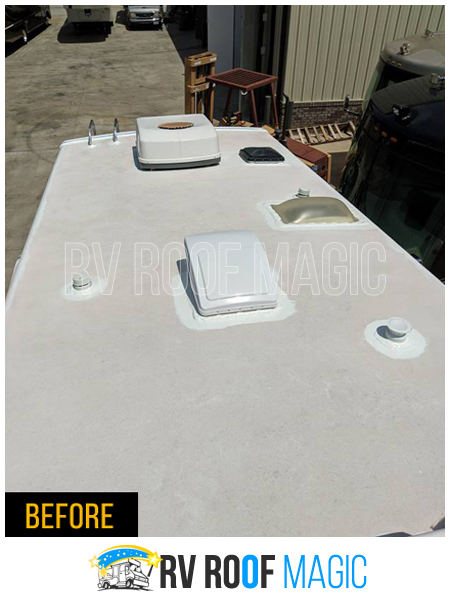
Inspect Your Roof
Before you go out purchasing
material to repair your RV roof, it’s a good idea to first have a look over
your RV roof. Sometimes the roof may only require a cleaning job but sometimes
it needs a re-sealing job if the damage is moderate. Look for any cracks or
leaks that would need to be filled out first. Keep an eye for signs of aging or
weathering. Also make a layout plan of your roof repair so that you are
more ready to tackle the sealing process.
Clean the Roof
Before you seal the roof, give it
a clean wash. Don’t use any harsh chemical compound or a generic detergent. RV
roofs are made up of very sensitive material and using harsh chemicals,
petroleum products or any generic cleaner will cause more harm to the RV roof.
Always use products which are RV dedicated and compatible to use on a
particular RV roof surface. Once you’ve sprayed the cleaner around the roof,
scrub it with a brush. Finally rinse the roof and let it dry. Cleaning the RV
roof will allow the RV roof repair sealant to adhere properly to the RV roof.
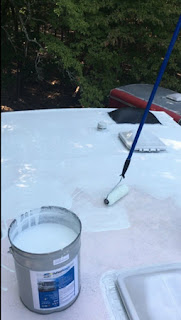
Apply the RV roof Repair Sealant
Starting by applying the sealant at
the edges of the roof, go around with a brush or a roller and work your way
around the roof. Slowly work your way around from one end of the roof to the
other end until all has been covered. Be sure to apply an even coat all around.
Don’t apply a second coat unless absolutely necessary. To cover uneven or rough
areas like antenna and vent openings, we recommend using a caulking gun. Make
sure that the RV roof repair sealant has completely covered any opening as
missed spots can easily grow into leaks that’ll be difficult to track in the
future.
Some Last Tips and Tricks
·
For nicer and clean edges, we recommend you
laying down some painter’s tape to keep the sealant from running down onto the
sides of your RV.
·
Invest in high quality materials like a quality
roller brush with an extendable handle. You’ll save your back from aching by
not having to bend over.
·
If necessary don’t be afraid to lay down a
second coat. The benefit of RV Roof sealants is that you can keep adding coats if
deemed necessary until you’re satisfied with how it looks.
Conclusion
Keeping your RV’s roof in up-keep and well maintained condition will keep you out on the road for years longer than if you let it fall into water deterioration. Checking in for wear and tear, cracks, or leaks yearly is a great first step, but remember to clean and seal your roof at the first sign of aging or weathering.
To purchase the best roof sealant on the market today and how to apply RV roof repair sealant properly visit https://www.rvroofmagic.com/blog/how-to-apply-rv-roof-sealant/

Comments
Post a Comment